
Phishing attempts targeting Microsoft 365 subscribers are rising quickly. Why? Targeting Microsoft is very appealing because it is used by many users and companies. Additionally, methods for getting around Multi-Factor Authentication (MFA) in phishing attacks are becoming more and more common (AiTM phishing attacks). Attackers can even access accounts that are MFA-protected thanks to this.
But what can we do about that?

Its pretty simple 😎
AitM detection via company branding CSS
But what does that mean?
It's evident from the clarion project that HuskyHacks hosts an API using Python Flask. The url() parameter, which acts as a trigger for the detection logic in CSS, is added to invoke this API. This detection logic examines the contents of the received HTTP header's "referer" field. This 'referer' field contains the absolute partial address from which a resource has been requested (meaning, the domain where the user was on when the url() parameter was called in CSS).
All of this makes sense if we see that a user's account is being logged into a Microsoft login page and the'referer' field does not say 'login.microsoftonline.com,' then we assume that the user was on an AitM site. This is due to the expectation that the Microsoft login page would only be accessible through the website "login.microsoftonline.com.".
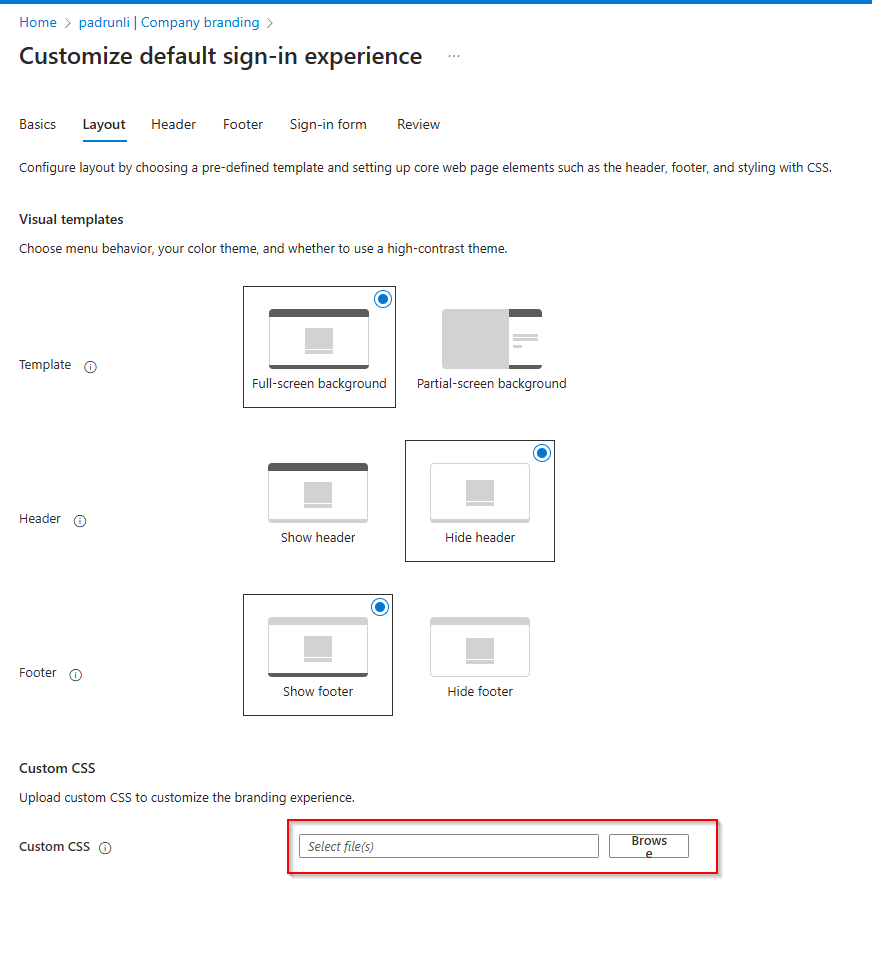
Step 1: Log in to your Microsoft Tenant
Open your web browser and go to the Company Branding page in the Azure Portal. Login with your tenants administrator account to visit the page.
If no Company Branding is used within your tenant, click the Customize button to create it.
Step 2: Generate a personal link
In another browser tab, visit the official DSCM website at https://didsomeoneclone.me. Enter the domain login.microsoftonline.com and your email in the sign-up form, and then wait a few seconds.
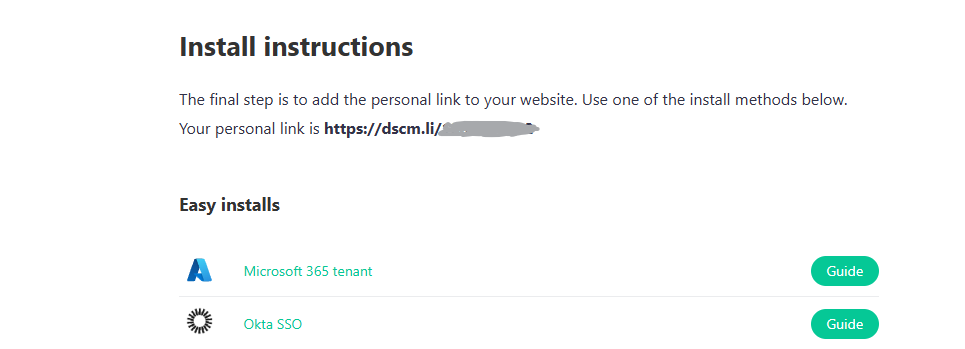
You will receive an email containing your personal link. Click the Install Instructions button in the email. On the destination page, your personal link is displayed:
Step 3: Create the CSS template file
Now it’s time to create a CSS file. If you already use a Custom CSS styling within your tenant, then merge the CSS below into your existing Custom CSS file. Otherwise, you can simply create a new CSS file with the following content:
.ext-sign-in-box {
  background: white url("<YOURLINK>") center no-repeat;
}
Make sure to replace the <YOURLINK> value with the link that you obtained in step 2.
Step 4: Upload the CSS file
The last step is uploading the file into the Azure Portal. Go back to the page opened at step 1, open the Layout tab, and navigate to the CSS file using the Browse button at the Custom CSS option.

After saving you are good to go! Enjoy you new AiTM Phishing Protection!